Difference between revisions of "Setup/Managing Users"
From Shopnix Help
(→Where I can access the Users feature ?) |
m (→Where can I access the Users feature ?) |
||
| (8 intermediate revisions by the same user not shown) | |||
| Line 1: | Line 1: | ||
<div style="margin-top:50px"> | <div style="margin-top:50px"> | ||
| − | == | + | ==Who are Users ?== |
<div align="justify"> | <div align="justify"> | ||
The users section allows you to add or update user’s details. Generally users section is useful when you (admin) wants give access to other user(s) to maintain the store. | The users section allows you to add or update user’s details. Generally users section is useful when you (admin) wants give access to other user(s) to maintain the store. | ||
| Line 6: | Line 6: | ||
</div></div> | </div></div> | ||
<div style="margin-top:50px"> | <div style="margin-top:50px"> | ||
| + | |||
==Where can I access the Users feature ?== | ==Where can I access the Users feature ?== | ||
<div align="justify"> | <div align="justify"> | ||
Go to store manager > SETUP > USERS | Go to store manager > SETUP > USERS | ||
| + | <div class="wiki-img"> | ||
[[Image:DU1.png | frameless | 1200px]] | [[Image:DU1.png | frameless | 1200px]] | ||
| + | </div> | ||
After clicking on the a new page will emerge | After clicking on the a new page will emerge | ||
| + | <div class="wiki-img"> | ||
[[Image:DU2.png | frameless | 1200px]] | [[Image:DU2.png | frameless | 1200px]] | ||
| + | </div> | ||
| + | |||
</div></div> | </div></div> | ||
<div style="margin-top:50px"> | <div style="margin-top:50px"> | ||
| Line 22: | Line 28: | ||
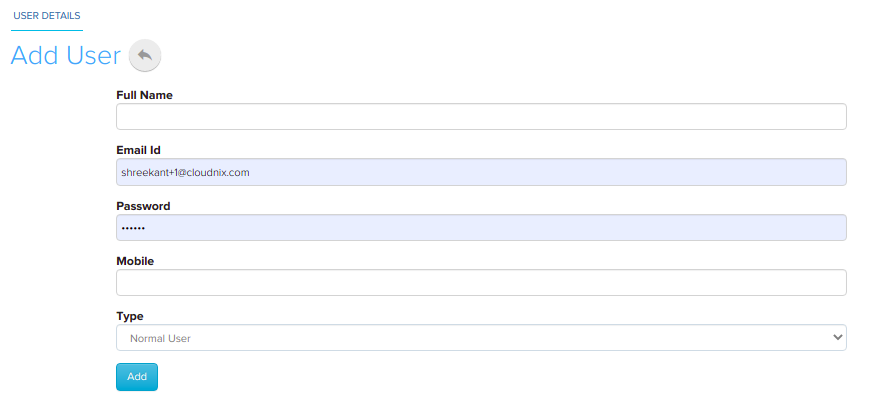
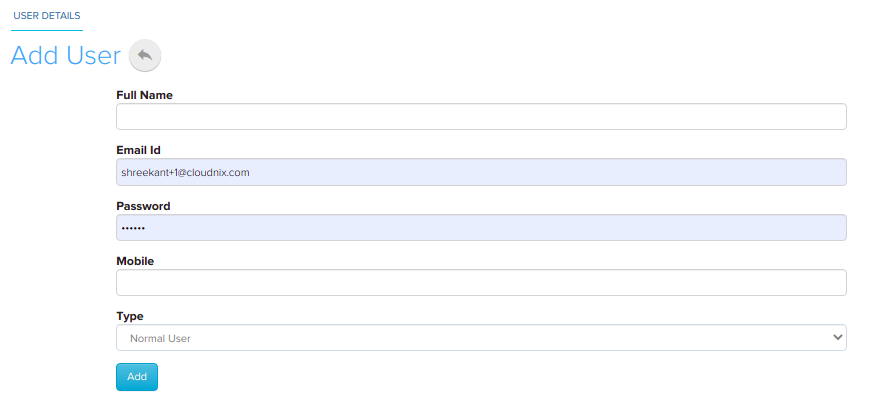
In order to add a new User click on the [[Image:DU9.png]]button. | In order to add a new User click on the [[Image:DU9.png]]button. | ||
| + | <div class="wiki-img"> | ||
[[Image:DU10.png|frameless|1200px]] | [[Image:DU10.png|frameless|1200px]] | ||
| + | </div> | ||
Suppose Full Name is: RK Sen, Email ID: RKSen@gmail.com, Mention the password, Mobile: 7806730976, Type: Normal User and click on the [[Image:AddBtn.png]] button. | Suppose Full Name is: RK Sen, Email ID: RKSen@gmail.com, Mention the password, Mobile: 7806730976, Type: Normal User and click on the [[Image:AddBtn.png]] button. | ||
| + | |||
| + | <div class="wiki-img"> | ||
[[Image:U4.png|frameless|1200px]] | [[Image:U4.png|frameless|1200px]] | ||
| + | </div> | ||
| − | |||
| − | |||
| − | |||
| − | |||
| − | |||
| + | <div class="wiki-img"> | ||
[[Image:U6.png | 1200px | frameless]] | [[Image:U6.png | 1200px | frameless]] | ||
| + | </div> | ||
| − | Here as you see User | + | Here as you can see the User Permission, in this section you can give privilege to the respective user(s). |
You can remove the permissions from the right side of the table by simply clicking on the [[Image:U7.jpg]] button. | You can remove the permissions from the right side of the table by simply clicking on the [[Image:U7.jpg]] button. | ||
| − | For example if you want to remove the permission Store>Catalog>Type>Delete then simply click on the [[Image:U7.jpg]] and | + | For example if you want to remove the permission. Go to Store>Catalog>Type>Delete then simply click on the [[Image:U7.jpg]] and |
| + | |||
| + | <div class="wiki-img"> | ||
[[Image:U8.png|1200px|frameless]] | [[Image:U8.png|1200px|frameless]] | ||
| + | </div> | ||
| + | |||
click on the [[Image:savebtn.png]] button | click on the [[Image:savebtn.png]] button | ||
Latest revision as of 23:55, 3 February 2022
Who are Users ?
The users section allows you to add or update user’s details. Generally users section is useful when you (admin) wants give access to other user(s) to maintain the store. For example: Suppose you are the owner of the store i.e. Admin and you want to give the privilege to another one to maintain the store behalf of you. So you can do those things here the important thing is that you can give certain or full control to the new one as per your requirement.
Where can I access the Users feature ?
Add new users and Edit the users
In order to add a new User click on the ![]() button.
button.
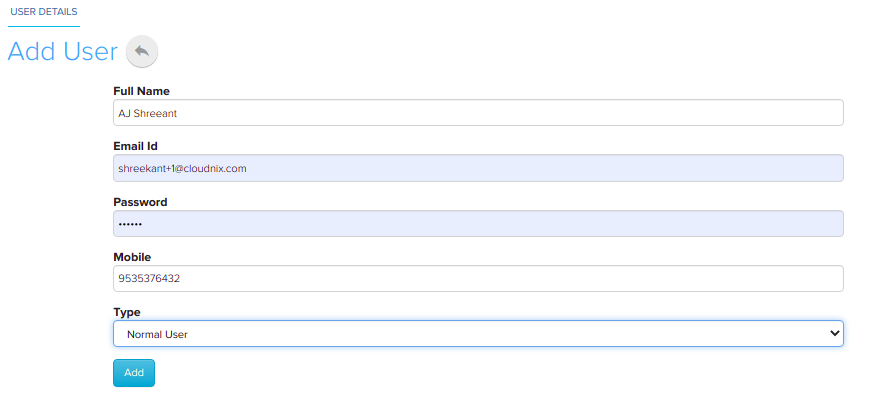
Suppose Full Name is: RK Sen, Email ID: RKSen@gmail.com, Mention the password, Mobile: 7806730976, Type: Normal User and click on the  button.
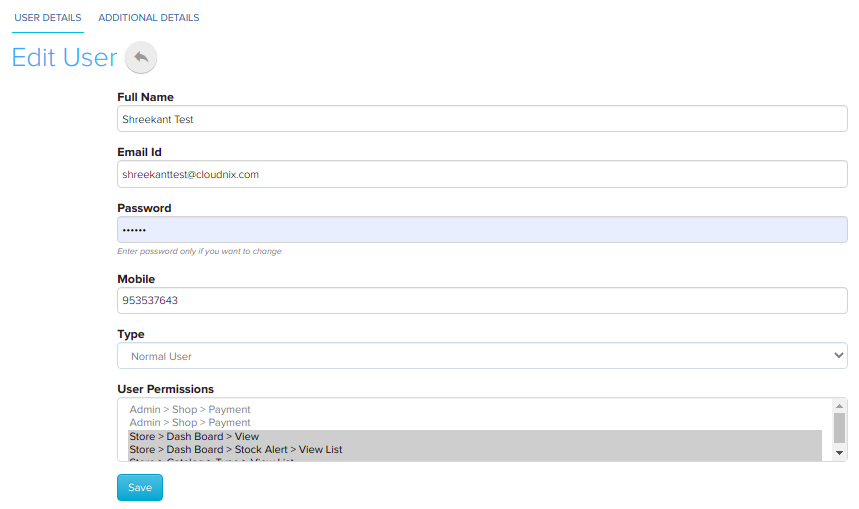
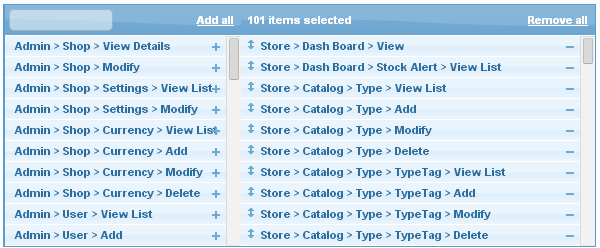
Here as you can see the User Permission, in this section you can give privilege to the respective user(s).
You can remove the permissions from the right side of the table by simply clicking on the ![]() button.
For example if you want to remove the permission. Go to Store>Catalog>Type>Delete then simply click on the
button.
For example if you want to remove the permission. Go to Store>Catalog>Type>Delete then simply click on the ![]() and
and
If you have more queries or would like assistance with this, please contact us on support@shopnix.in.


