Difference between revisions of "Products/Bulk importing products"
From Shopnix Help
(→What is Bulk Uploading of Products?) |
m |
||
| Line 28: | Line 28: | ||
2. Go to - Products > Upload Products CSV. | 2. Go to - Products > Upload Products CSV. | ||
| + | <div class="wiki-img"> | ||
[[Image:uploadproduct.png]] | [[Image:uploadproduct.png]] | ||
| − | + | </div> | |
3. Download the products template CSV sheet by clicking on Download Button as shown in below image. | 3. Download the products template CSV sheet by clicking on Download Button as shown in below image. | ||
| + | <div class="wiki-img"> | ||
[[Image:Product_Upload_Csv.png|center]] | [[Image:Product_Upload_Csv.png|center]] | ||
| − | + | </div> | |
4. Fill all the details required in Excel file as showing in below image. | 4. Fill all the details required in Excel file as showing in below image. | ||
'''Note-'''In SKU (Stock Keeping Unit) field of excel sheet you need to fill a unique number for your product. | '''Note-'''In SKU (Stock Keeping Unit) field of excel sheet you need to fill a unique number for your product. | ||
| + | <div class="wiki-img"> | ||
[[Image:excelsheet.png|center]] | [[Image:excelsheet.png|center]] | ||
| − | + | </div> | |
5. Now click on choose file for uploading updated excel sheet and browse the updated excel sheet. | 5. Now click on choose file for uploading updated excel sheet and browse the updated excel sheet. | ||
| + | <div class="wiki-img"> | ||
[[Image:csv.jpgchoosecsv.png|center]] | [[Image:csv.jpgchoosecsv.png|center]] | ||
| + | </div> | ||
6. After choosing excel file, click on Upload Products button. | 6. After choosing excel file, click on Upload Products button. | ||
| + | <div class="wiki-img"> | ||
[[Image:uploadfile.png|center]] | [[Image:uploadfile.png|center]] | ||
| − | + | </div> | |
7. After clicking on Upload button you will get a list of products i.e. whether the upload operation is successfully performed or not. | 7. After clicking on Upload button you will get a list of products i.e. whether the upload operation is successfully performed or not. | ||
| + | <div class="wiki-img"> | ||
[[Image:success.jpg]] | [[Image:success.jpg]] | ||
| − | + | </div> | |
Now you uploaded your product detail successfully. Now it's time to upload the images for your products | Now you uploaded your product detail successfully. Now it's time to upload the images for your products | ||
</div></div> | </div></div> | ||
| Line 61: | Line 68: | ||
2. Go to - '''Products > Upload Products Images.''' | 2. Go to - '''Products > Upload Products Images.''' | ||
| + | <div class="wiki-img"> | ||
[[Image:uploadimage.png|center]] | [[Image:uploadimage.png|center]] | ||
| − | + | </div> | |
3. Click on Upload Button and select all the images whatever you want to upload. | 3. Click on Upload Button and select all the images whatever you want to upload. | ||
| Line 69: | Line 77: | ||
Image name should be same as the product SKU otherwise the image will not be accepted/uploaded. | Image name should be same as the product SKU otherwise the image will not be accepted/uploaded. | ||
| + | <div class="wiki-img"> | ||
[[Image:Product_Upload_Images.png|center]] | [[Image:Product_Upload_Images.png|center]] | ||
| − | + | </div> | |
4. After clicking on Open button you will get a status list of images i.e. images are uploaded successfully or not. | 4. After clicking on Open button you will get a status list of images i.e. images are uploaded successfully or not. | ||
| + | <div class="wiki-img"> | ||
[[Image:image.jpg|center]] | [[Image:image.jpg|center]] | ||
| − | + | </div> | |
Now your images are uploaded successfully. | Now your images are uploaded successfully. | ||
Revision as of 16:23, 7 February 2022
Contents
What is Bulk Uploading of Products?
By this feature of shopnix we can upload numbers of products at a time instead of uploading the product one by one.
How to upload Products in Bulk?
Bulk uploading can be performed in two steps-
1. Upload the Products using CSV.
2. Upload images for the Products.
1. Upload the Products
For uploading the products in bulk you need to follow the below steps-
1. Login to the Store Manager http://shopnix.in/admin by your credentials.
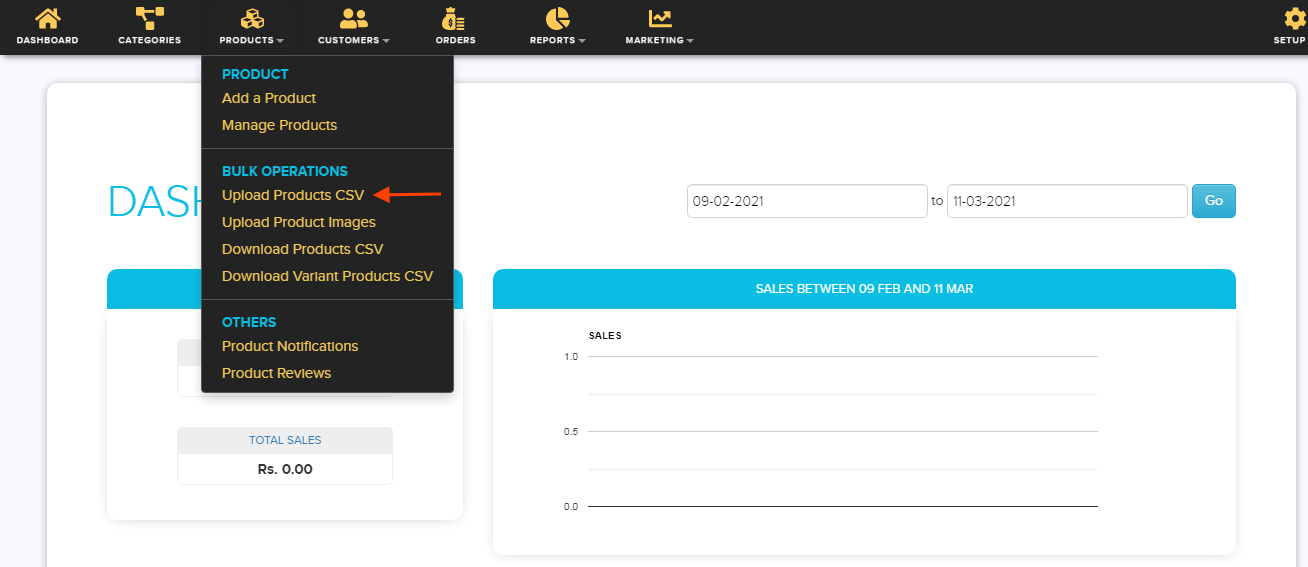
2. Go to - Products > Upload Products CSV.
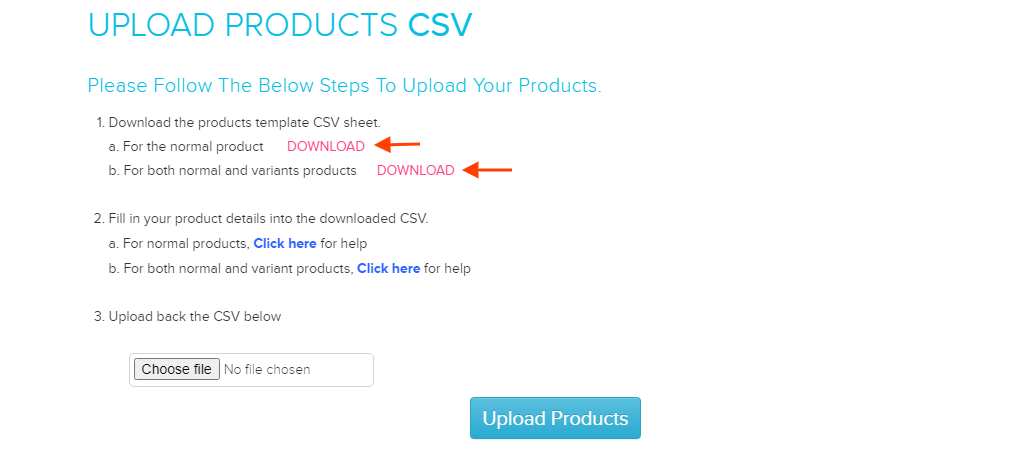
3. Download the products template CSV sheet by clicking on Download Button as shown in below image.
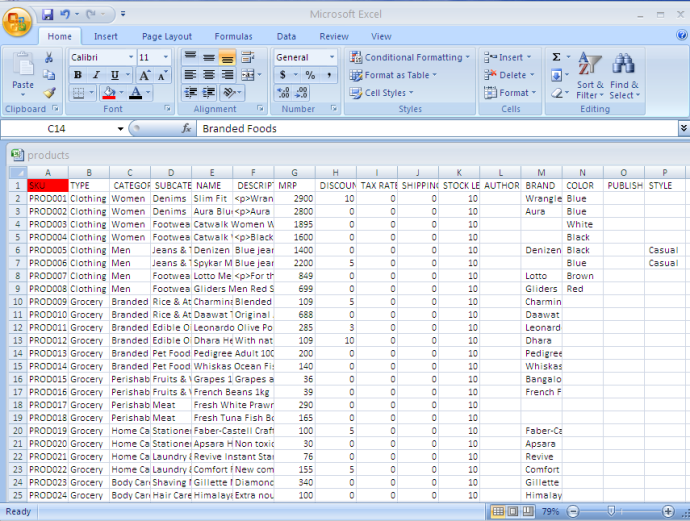
4. Fill all the details required in Excel file as showing in below image.
Note-In SKU (Stock Keeping Unit) field of excel sheet you need to fill a unique number for your product.
5. Now click on choose file for uploading updated excel sheet and browse the updated excel sheet.
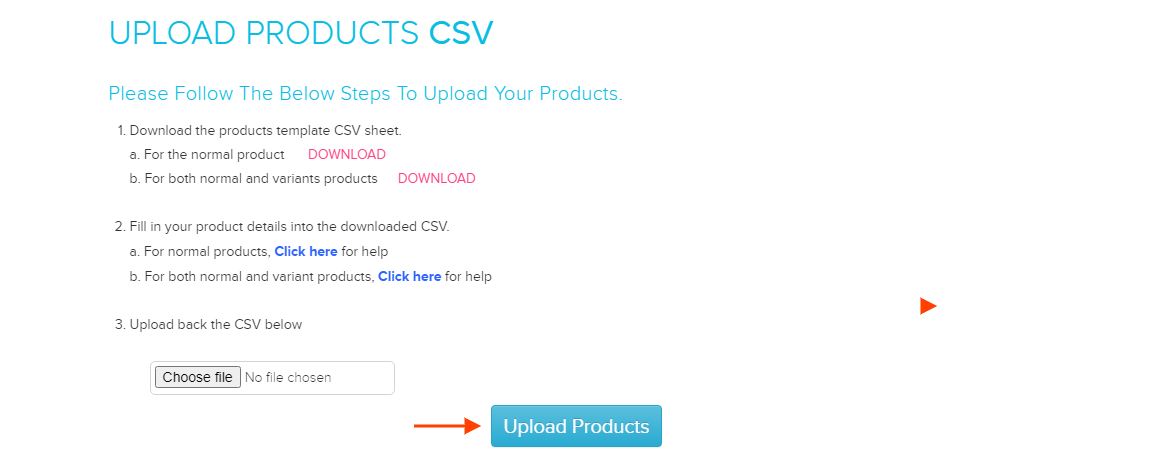
6. After choosing excel file, click on Upload Products button.
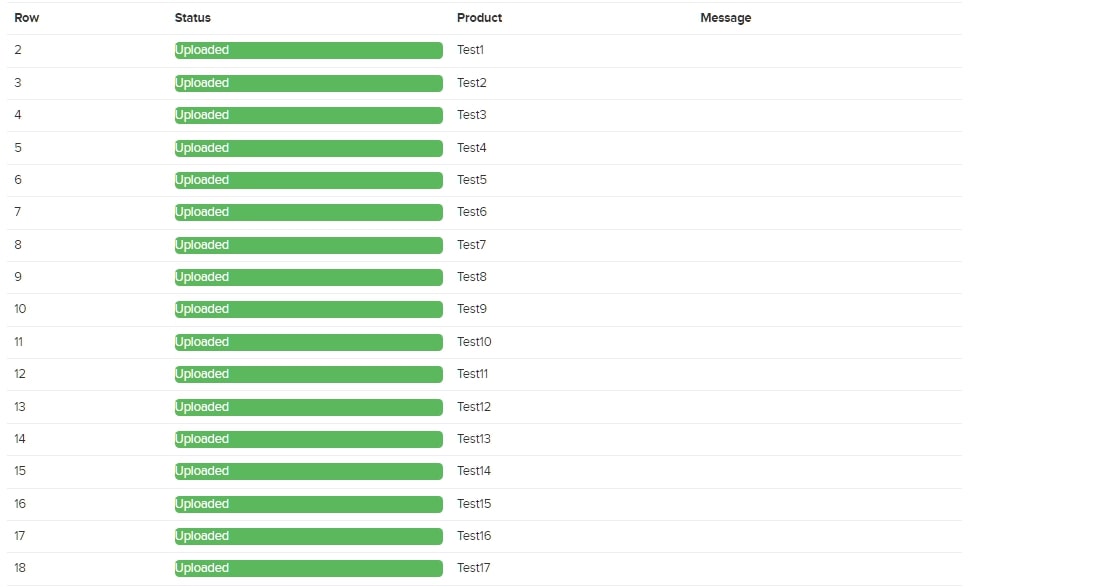
7. After clicking on Upload button you will get a list of products i.e. whether the upload operation is successfully performed or not.
Now you uploaded your product detail successfully. Now it's time to upload the images for your products
2. Upload the images for Products
1. Login to the Store Manager http://shopnix.in/admin by your credentials.
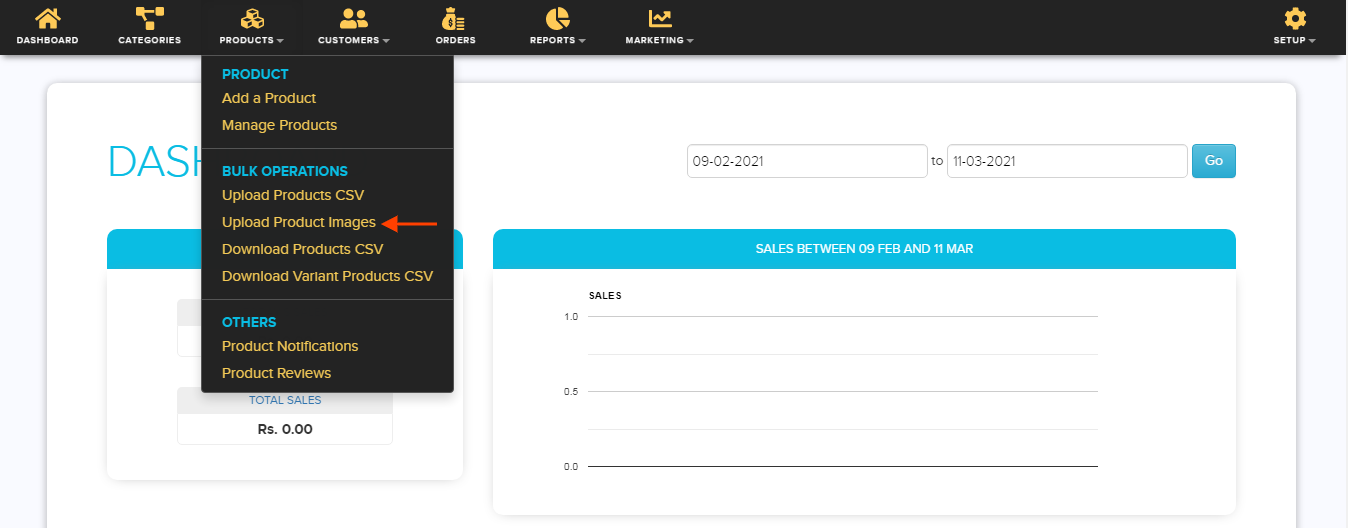
2. Go to - Products > Upload Products Images.
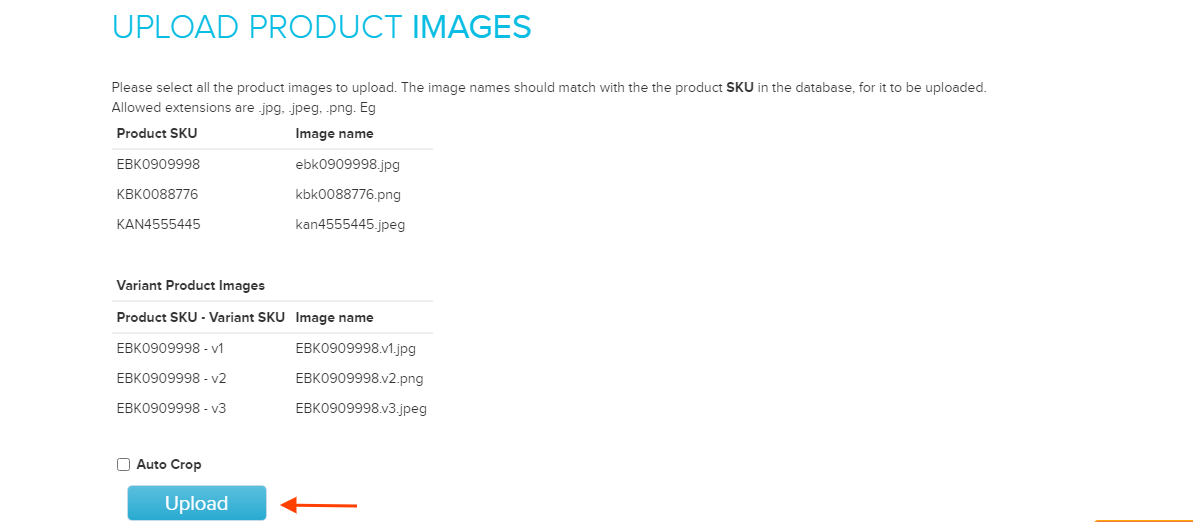
3. Click on Upload Button and select all the images whatever you want to upload.
Important:-
Image name should be same as the product SKU otherwise the image will not be accepted/uploaded.
4. After clicking on Open button you will get a status list of images i.e. images are uploaded successfully or not.
Now your images are uploaded successfully.
If you have more queries or would like assistance with this please contact us on support@shopnix.in.

