Difference between revisions of "Products/Warranty"
From Shopnix Help
(→Where can I access the Warranty feature?) |
(→Where can I access the Warranty feature?) |
||
| (7 intermediate revisions by the same user not shown) | |||
| Line 25: | Line 25: | ||
<li>'''Warranty Types''': Define the different warranty policies</li> | <li>'''Warranty Types''': Define the different warranty policies</li> | ||
<li>'''Registrations''': View customer warranty submissions</li></ul> | <li>'''Registrations''': View customer warranty submissions</li></ul> | ||
| − | <div style="max-width: 400px; padding: | + | <div style="max-width: 400px; padding: 7px; border: 1px solid #ddd; text-align: center; background-color: #f9f9f9;"> |
| − | Click Warranty Type[[File:PlusSymbol.jpg]] to create a new warranty</div> <br> | + | Click Warranty Type[[File:PlusSymbol.jpg]] to create a new warranty </div><br> |
<div style="max-width: 600px; margin: 20px auto; padding: 10px; border: 1px solid #ddd; text-align: center; background-color: #f9f9f9;"> | <div style="max-width: 600px; margin: 20px auto; padding: 10px; border: 1px solid #ddd; text-align: center; background-color: #f9f9f9;"> | ||
| Line 33: | Line 33: | ||
</div><hr> | </div><hr> | ||
<ul>Fill in the following details: | <ul>Fill in the following details: | ||
| − | <li> | + | <li>'''Warranty Name''':Enter warranty name (e.g., "1-Year Seller Warranty").</li> |
| − | <li> | + | <li>'''Terms & Conditions''':Link a page or URL for Terms for your customers to read</li> |
| − | <li> | + | <li>'''Warranty Validity(In months)''':Enter the warranty validity in months (e.g., 6, 12, 24 months).</li> |
| − | <li> | + | <li>If you have a serial number for your product, then select yes, to later add serial number.Else ,please select No</li> |
| − | |||
| − | |||
| − | |||
| − | |||
</ul> | </ul> | ||
Click on [[File:savenext.png]]<br><br> | Click on [[File:savenext.png]]<br><br> | ||
| Line 47: | Line 43: | ||
[[File:AddWarranty.png]] | [[File:AddWarranty.png]] | ||
</div><hr><br> | </div><hr><br> | ||
| − | <ul> | + | <ul>Now lets configure Products that falls in the warranty added |
<li>'''All Products''': Displays the complete catalog (e.g., Sweets, Electronics)</li> | <li>'''All Products''': Displays the complete catalog (e.g., Sweets, Electronics)</li> | ||
<li>'''Category''': Refines by broader group (e.g., Ghee Sweets, Dry Fruit Sweets)</li> | <li>'''Category''': Refines by broader group (e.g., Ghee Sweets, Dry Fruit Sweets)</li> | ||
Latest revision as of 16:18, 30 May 2025
What is Shopnix Warranty?
The Warranty Module allows store owners to create and manage product warranties directly from Shopnix . This feature enables you to offer different warranty plans for products, track warranty claims, and automate warranty expiration.
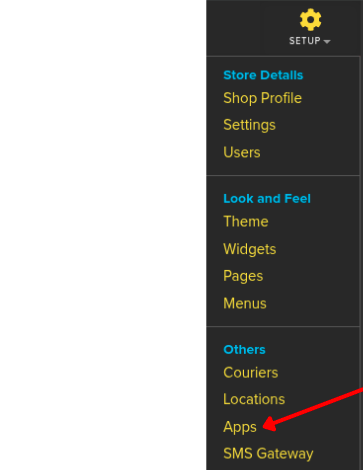
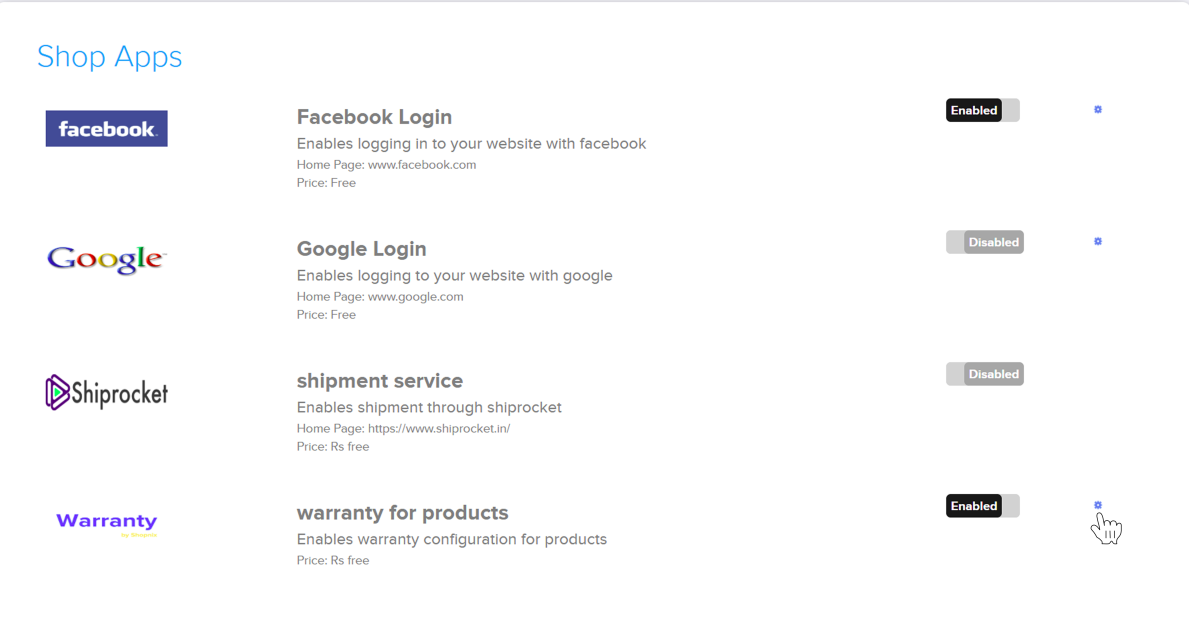
Where can I access the Warranty feature?
Here, you will see two main tabs:
- Warranty Types: Define the different warranty policies
- Registrations: View customer warranty submissions
- Fill in the following details:
- Warranty Name:Enter warranty name (e.g., "1-Year Seller Warranty").
- Terms & Conditions:Link a page or URL for Terms for your customers to read
- Warranty Validity(In months):Enter the warranty validity in months (e.g., 6, 12, 24 months).
- If you have a serial number for your product, then select yes, to later add serial number.Else ,please select No
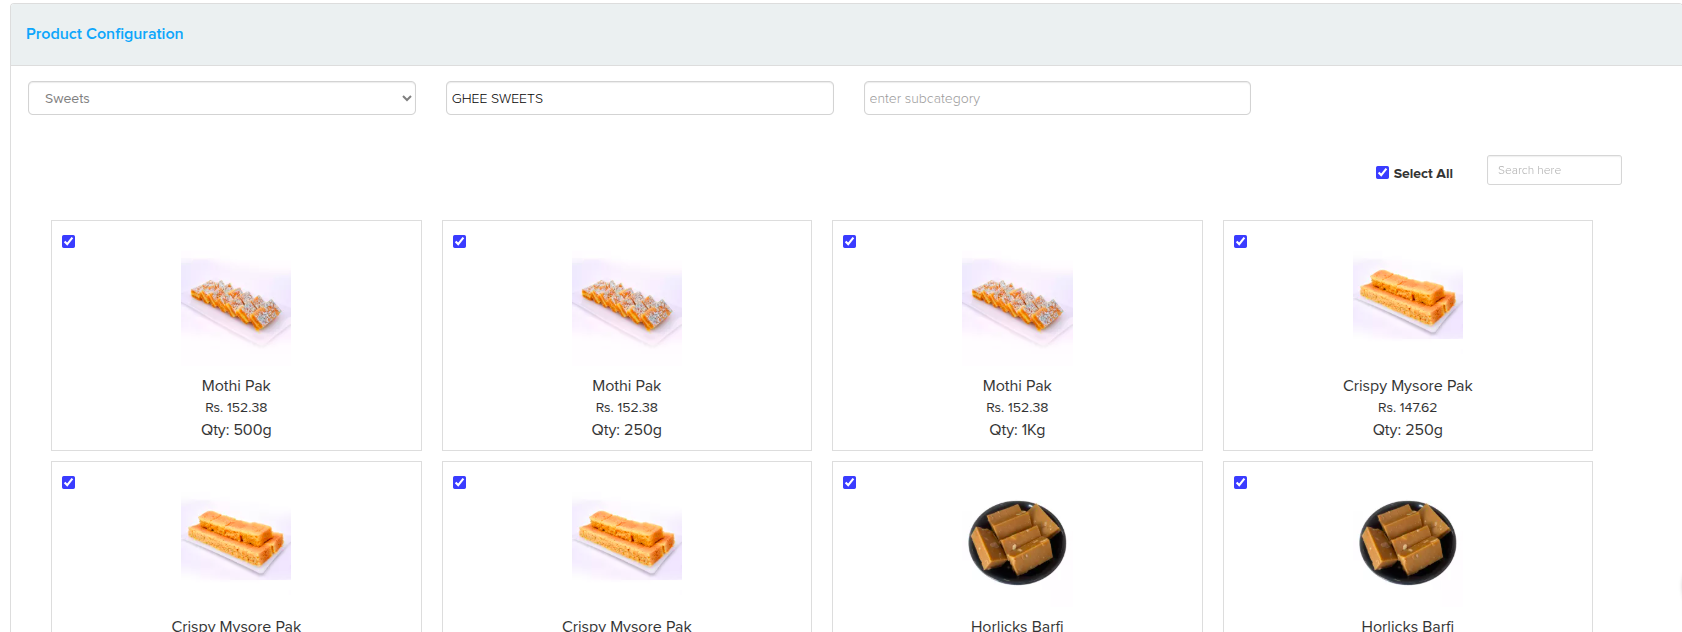
- Now lets configure Products that falls in the warranty added
- All Products: Displays the complete catalog (e.g., Sweets, Electronics)
- Category: Refines by broader group (e.g., Ghee Sweets, Dry Fruit Sweets)
- Subcategory: Narrows down to specific product types (e.g., Kaju, Badam)
- Search Bar: Allows quick, keyword-based lookup of products
- If the warranty applies to all sweets, the admin can simply filter by category and use the "Select All" checkbox to assign the warranty in bulk.
- If the warranty applies to specific items only (e.g., "Mysore Pak 500g"), the admin can manually select individual checkboxes for precise control.
- Dropdowns and input fields allow the store admin to assign serial number ranges to the selected products.
- Product/SKU:A dropdown menu showing the selected products (e.g., "6 selected") that will be assigned serial numbers.
- Prefix:A custom string that appears at the beginning of each serial number (e.g., "May").
- Range Start & End:Defines the numeric range of the serials (e.g., from May-1 to May-600), used to uniquely identify each item.
- Suffix (Optional):Adds a value to the end of the serial number (e.g., 25 to form May-1-25).
- The admin can click Add New Range to queue multiple serial batches for different product lines.
Then newly created warranty types appear under the Warranty Types tab.
Once a customer successfully registers a product for warranty, the details are recorded under the Registrations tab.
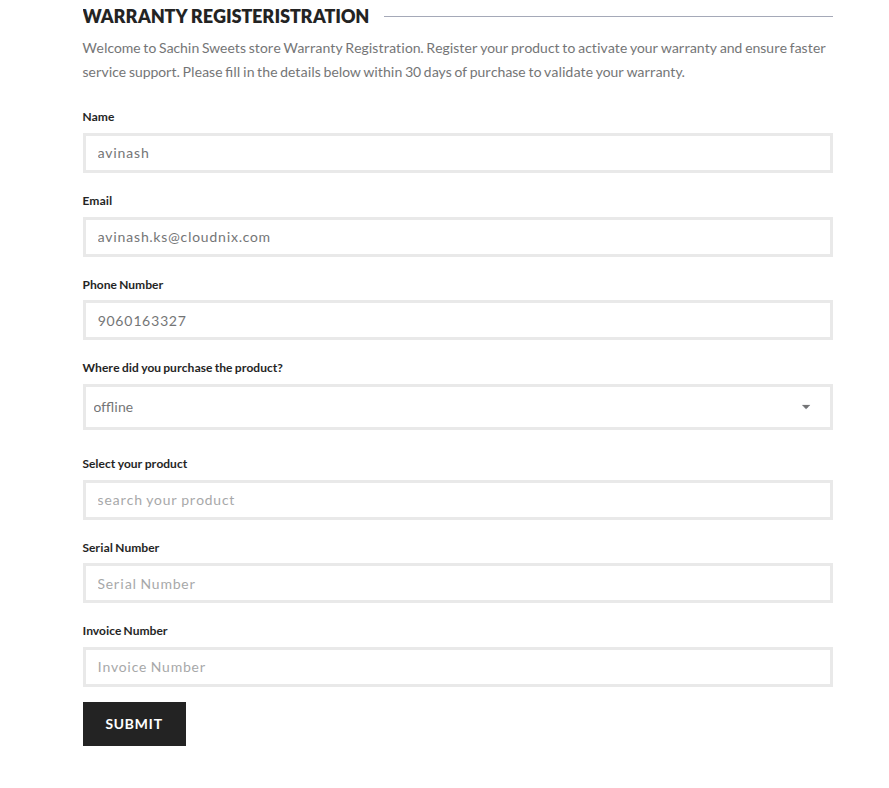
In the store's page (From customer side)
- Customer logs in or signs up via Login / Sign Up page
- Navigates to Register Product page
- Selects Product Type and enters Product Name
- Enters Warranty Card Number
- Selects Date and Place of Purchase
- Enters Warranty Card Number
- Uploads Invoice File (.jpg / .png / .pdf)
- Clicks SUBMIT
If you have more queries or would like assistance with this, please contact us on support@shopnix.in.


