Difference between revisions of "Add Locations"
From Shopnix Help
(Created page with "For adding Locations in your shop you need to follow below- Go to Admin >Setup >Locations. In Shopnix there is a feature by which you can load all the Indian states in your sh...") |
|||
| Line 1: | Line 1: | ||
For adding Locations in your shop you need to follow below- | For adding Locations in your shop you need to follow below- | ||
| − | Go to Admin >Setup >Locations. | + | |
| − | In Shopnix there is a feature by which you can load all the Indian states in your shop for this you need to click on | + | Go to '''Admin >Setup >Locations.''' |
| − | + | ||
| + | In Shopnix there is a feature by which you can load all the Indian states in your shop for this you need to click on [[Image:load.png]] by default all the states will be active if want to change into inactive or active then you need to uncheck or check the box after the state name - [[Image:action.png]] | ||
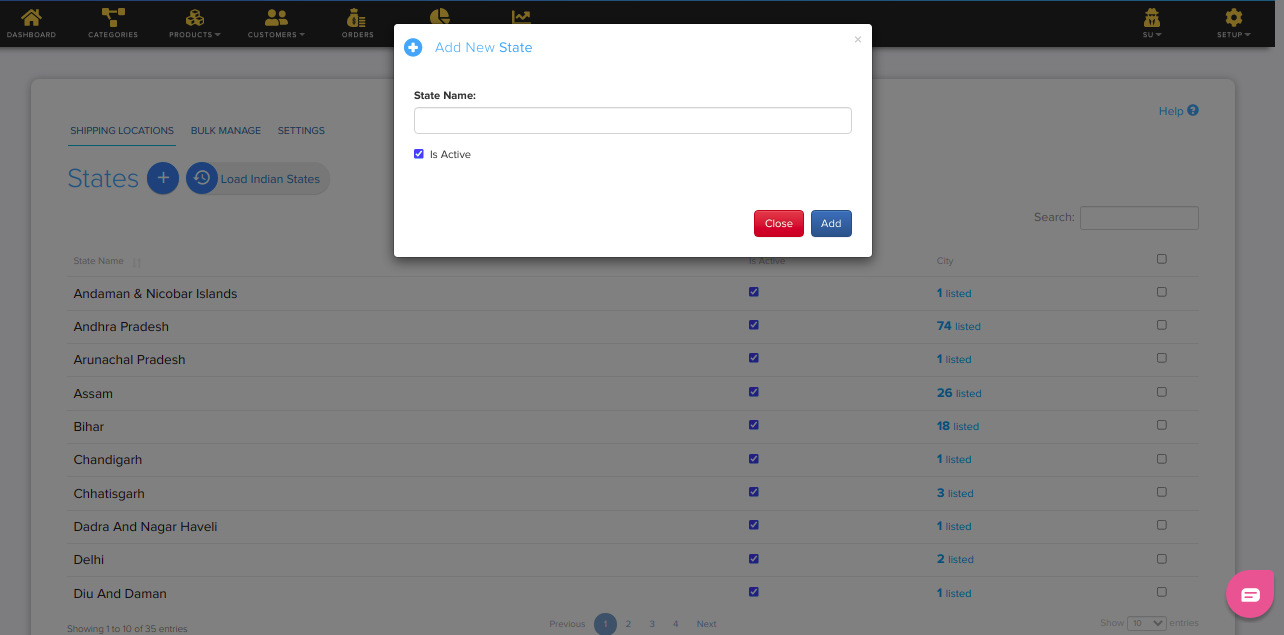
| − | If you want to add another state then you need fill the name of state and click on Add button as following below- | + | If you want to add another state then you need fill the name of state and click on Add button as following below- |
| + | |||
| + | [[Image:states.png]] | ||
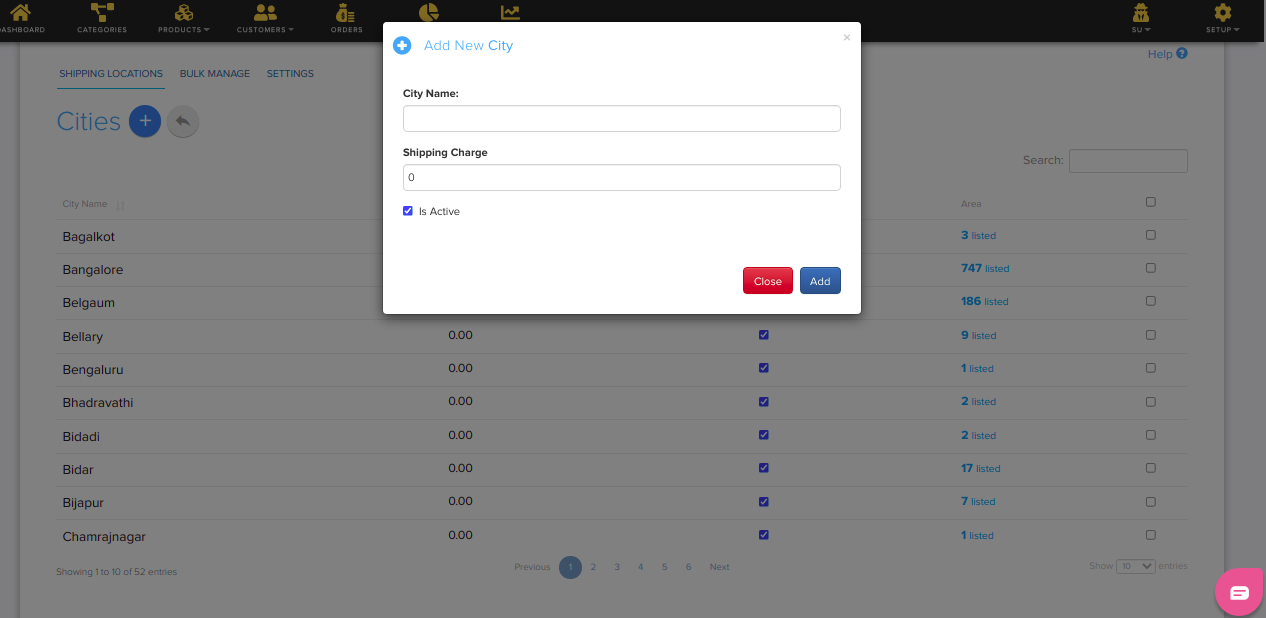
If you want to add city in your state then you need to click on City button after the name of state then in redirecting page you need to fill the city name and click on Add button as follows- | If you want to add city in your state then you need to click on City button after the name of state then in redirecting page you need to fill the city name and click on Add button as follows- | ||
| + | |||
| + | [[Image:cities.png]] | ||
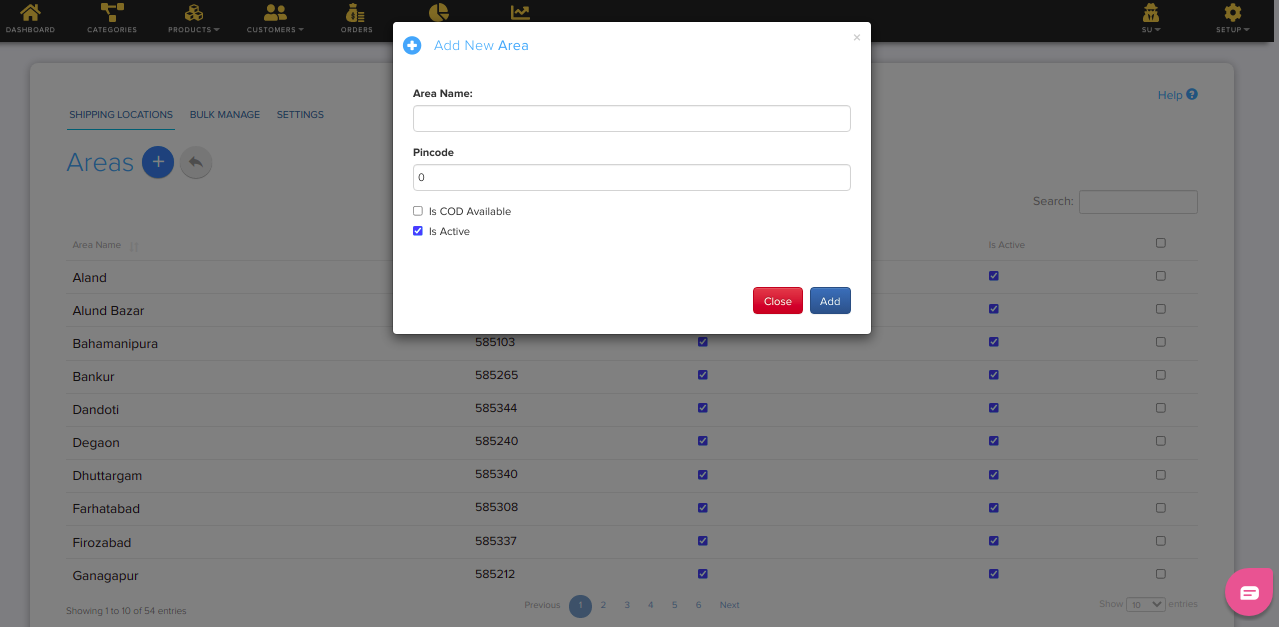
If you want to add places in city then you need to click on Area button after the name of city then in redirecting page you need to fill the Area name and Pincode and then click on Add button as follows- | If you want to add places in city then you need to click on Area button after the name of city then in redirecting page you need to fill the Area name and Pincode and then click on Add button as follows- | ||
| + | |||
| + | [[Image:area.png]] | ||
Revision as of 17:11, 25 April 2014
For adding Locations in your shop you need to follow below-
Go to Admin >Setup >Locations.
In Shopnix there is a feature by which you can load all the Indian states in your shop for this you need to click on ![]() by default all the states will be active if want to change into inactive or active then you need to uncheck or check the box after the state name - File:Action.png
by default all the states will be active if want to change into inactive or active then you need to uncheck or check the box after the state name - File:Action.png
If you want to add another state then you need fill the name of state and click on Add button as following below-
If you want to add city in your state then you need to click on City button after the name of state then in redirecting page you need to fill the city name and click on Add button as follows-
If you want to add places in city then you need to click on Area button after the name of city then in redirecting page you need to fill the Area name and Pincode and then click on Add button as follows-


