Difference between revisions of "Products/product variant"
From Shopnix Help
(Created page with "<div style="margin-top:50px"> == How to Add Product Variants? == <div align="justify"> 1. Login to the Store Manager http://shopnix.in/admin by your credentials. 2. Go to -...") |
(→Where I can access the Add product Variant feature?) |
||
| (15 intermediate revisions by the same user not shown) | |||
| Line 2: | Line 2: | ||
== How to Add Product Variants? == | == How to Add Product Variants? == | ||
<div align="justify"> | <div align="justify"> | ||
| − | + | '''Add product Variant:''' If the store owner has a product that comes in different styles or sizes, the variant option can allow the store's owner to display the same for a product. When customers want to check the different styles or sizes of that particular product, he/she can change between the styles or sizes from the drop down option and the image of that product will change accordingly. | |
| + | </div> | ||
| + | </div> | ||
| + | <div style="margin-top:50px"> | ||
| − | + | ==Where I can access the Add product Variant feature?== | |
| + | <div align="justify"> | ||
| + | <u>'''Add product variants:'''</u> | ||
| + | You can add new products by following | ||
| + | Go to store manager > PRODUCTS > ADD NEW PRODUCT | ||
| − | [[Image: | + | [[Image:vari1.png|frameless|1200px]] |
| − | + | after clicking you will redirected to | |
| − | + | [[Image:vari2.png | frameless |1200px]] | |
| − | + | Click on the '''The product has multiple option''' option. | |
| + | For Example | ||
| − | [[Image: | + | [[Image:vari3.png | frameless |1200px]] |
| − | + | You can also add an image for the variant also by clicking on the image option like below | |
| − | [[Image:image. | + | [[Image:vari-image.png | frameless |1200px]] |
| − | |||
| − | |||
| − | If you have more queries or would like assistance with this | + | After adding the option name click on the [[Image:vari btn.png | frameless |1200px]] |
| + | |||
| + | So finally it will look like below | ||
| + | |||
| + | [[Image:vari10.png | frameless |1200px]]. | ||
| + | |||
| + | |||
| + | Or you can download the CSV from Upload Product CSV section | ||
| + | [[Image:casv1.png | frameless |1200px]]. | ||
| + | |||
| + | And place the variant names and values in to CSV like below | ||
| + | |||
| + | [[Image:casv2.png | frameless |1200px]]. | ||
| + | |||
| + | |||
| + | Now check the store | ||
| + | |||
| + | the grid and list page will look like below | ||
| + | |||
| + | [[Image:variant5.png | frameless |1200px]] | ||
| + | |||
| + | [[Image:variant6.png | frameless |1200px]] | ||
| + | |||
| + | By switching between different option the price will also change accordingly. | ||
| + | Now check the product's details page | ||
| + | |||
| + | |||
| + | [[Image:variant14.png | frameless |1200px]] | ||
| + | |||
| + | |||
| + | |||
| + | |||
| + | |||
| + | If you have more queries or would like assistance with this please contact us on [mailto:support@shopnix.in support@shopnix.in]. | ||
</div> | </div> | ||
</div> | </div> | ||
Latest revision as of 10:27, 19 December 2014
How to Add Product Variants?
Add product Variant: If the store owner has a product that comes in different styles or sizes, the variant option can allow the store's owner to display the same for a product. When customers want to check the different styles or sizes of that particular product, he/she can change between the styles or sizes from the drop down option and the image of that product will change accordingly.
Where I can access the Add product Variant feature?
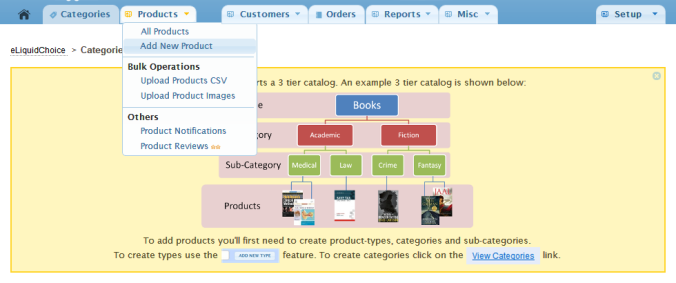
Add product variants: You can add new products by following Go to store manager > PRODUCTS > ADD NEW PRODUCT
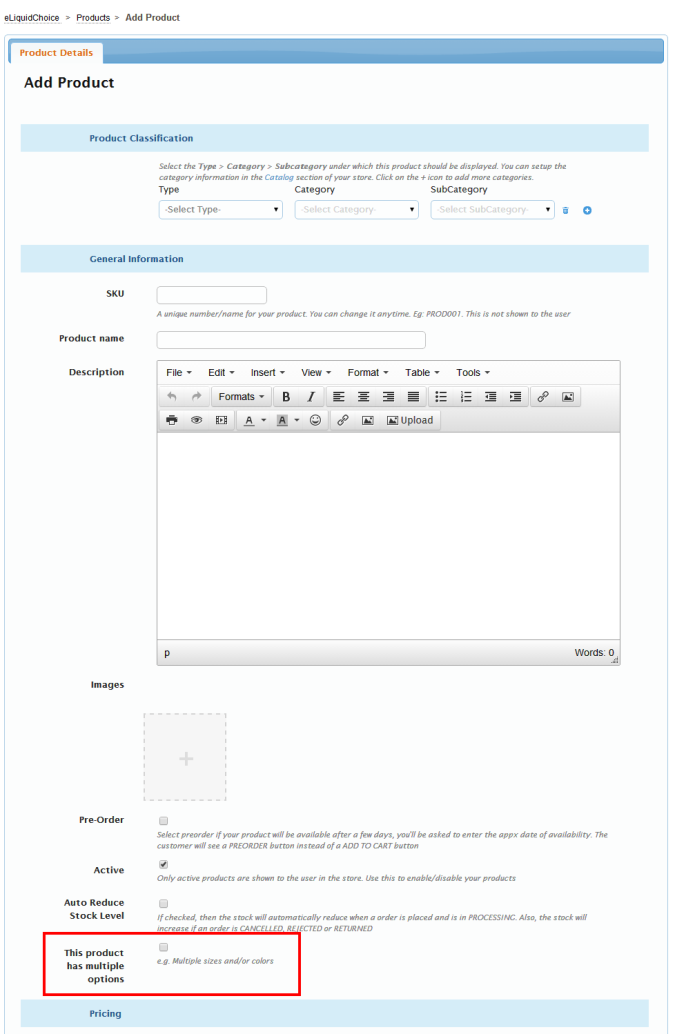
after clicking you will redirected to
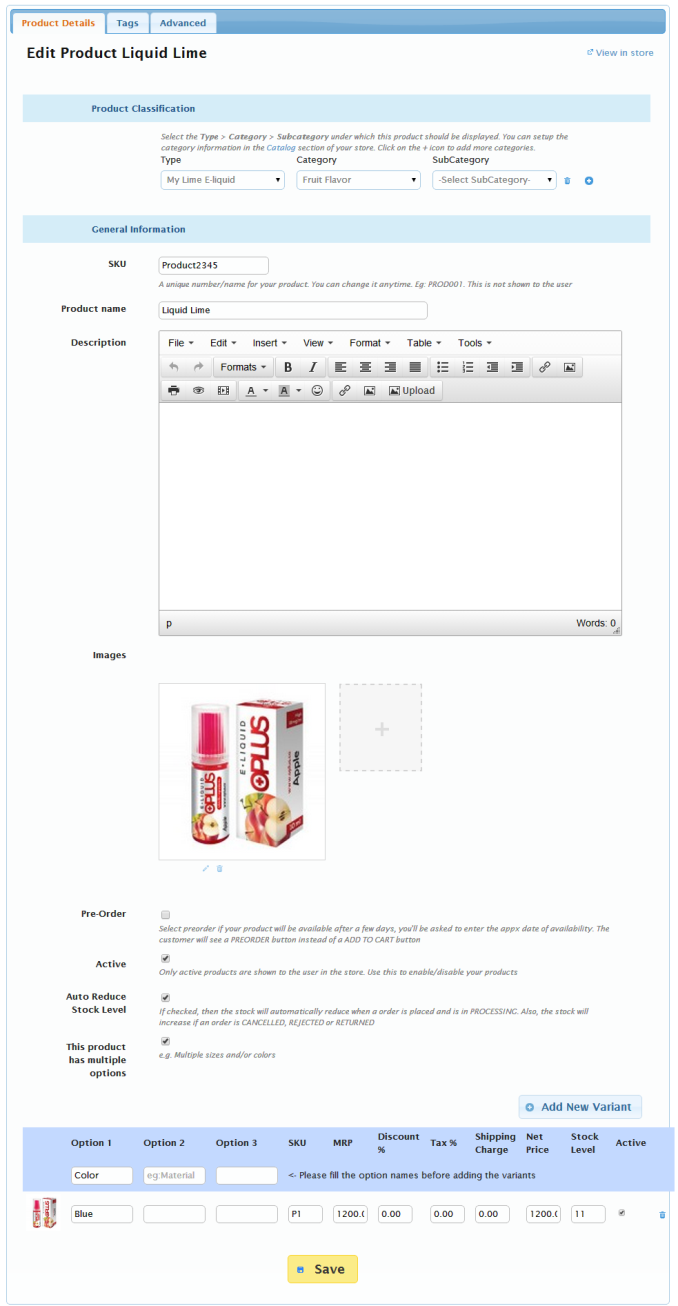
Click on the The product has multiple option option. For Example
You can also add an image for the variant also by clicking on the image option like below
After adding the option name click on the 
So finally it will look like below
Or you can download the CSV from Upload Product CSV section
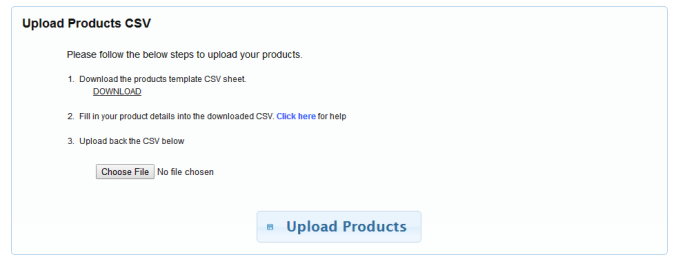 .
.
And place the variant names and values in to CSV like below
Now check the store
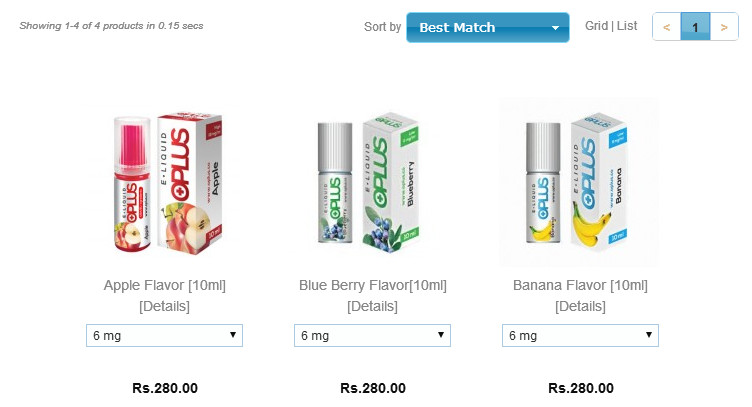
the grid and list page will look like below
By switching between different option the price will also change accordingly. Now check the product's details page
If you have more queries or would like assistance with this please contact us on support@shopnix.in.

