Difference between revisions of "Design/Widget-Add/Edit"
From Shopnix Help
(Created page with "== HTML WIDGETS == The HTML Widget allows you to add and edit your own HTML code into your Shop. This will allow you to extend your shop by adding many thirdparty plugins and...") |
(→HTML WIDGETS) |
||
| Line 1: | Line 1: | ||
== HTML WIDGETS == | == HTML WIDGETS == | ||
| + | <div align="justify"> | ||
The HTML Widget allows you to add and edit your own HTML code into your Shop. This will allow you to extend your shop by adding many thirdparty plugins and custom content. | The HTML Widget allows you to add and edit your own HTML code into your Shop. This will allow you to extend your shop by adding many thirdparty plugins and custom content. | ||
| Line 5: | Line 6: | ||
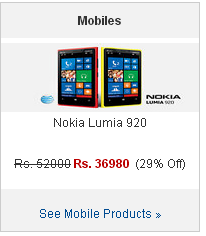
[[Image:HTMLWidgets.png|middle|450px]] | [[Image:HTMLWidgets.png|middle|450px]] | ||
| + | </div> | ||
== What can I use HTML Widgets for ? == | == What can I use HTML Widgets for ? == | ||
Revision as of 12:59, 11 July 2014
HTML WIDGETS
The HTML Widget allows you to add and edit your own HTML code into your Shop. This will allow you to extend your shop by adding many thirdparty plugins and custom content.
Widgets are small, self-sufficient content blocks that can be added to your shop to offer your visitors more value. Widgets are easy to install and use, making it a great way to improve a website without any programing skills. Designers can directly control the look and feel of the store using widgets as well.

What can I use HTML Widgets for ?
You can use widgets to add the below stuff to your shop
- Your store footer
- Banners/text in home/product page
- Banners/text on the left nav
- Videos
- Google Calender
- Google Maps
- Facebook plugins
- Linkdedin plugins
- Twitter plugins
- Google+ plugins
- Stats Counter
- Wufoo forms
- LiveChats
- etc

How do I create a HTML Widget
To create a HTML Widget, follow the below steps
1. Logon to your Shopnix Store Manager
2. Goto Products > Widgets
3. Click on Add New Widget button. This will open a page where you can create a new widget
4. In the editor that is provided, design your widget, you can add images, videos and other graphics using the editors toolbar

5.If you want to add CSS and JavaScript then you can add those in FOOTER or HEADER,the HTML part you can add here.Like below

click on the source code and an editor will open there you can put your html code like below

6. You can select which page you want the widget to appear by selecting the pages below

7. Once you are done, just click SAVE to save your widget
8. Now refresh your shop page in your browser and the widget you have created should appear in the page.
For example I have created a blinking button for my store (Note: I put the CSS in the footer).

If you have more queries or would like assistance with this please contact us on support@shopnix.in.